Why I Upgraded My ROG Ally
I recently bought a new ROG Ally from Best Buy. Even though it’s been out for a while, it’s still a solid handheld gaming device. That said, the stock 40Wh battery is pretty terrible when it comes to gaming longevity. To fix that, I upgraded it with a 65Wh battery from JSAUX. I also took the opportunity to install a 2TB SSD and replace the operating system with Steam OS.https://www.youtube.com/watch?v=gK5RzlF7E18&list=PL8EcHtflxz7U9l1xvFXRjASMKEwHONYzn
What’s Included in the JSAUX 65Wh Battery Kit
The JSAUX battery upgrade kit was extremely well put together. It included everything I needed for the installation: the 65Wh battery itself, a durable aluminum battery bracket, clippers, a screwdriver, various small parts including screws and plastic pry tools, a replacement back plate to accommodate the larger battery, a heat sink, written instructions, and even a set of gloves. One of the things I appreciated most was how organized everything was. Each screw was individually packaged and labeled, and there was a picture included showing exactly where each screw was supposed to go. This level of detail made the process much easier. My previous battery kit for another ROG Ally didn’t come with an aluminum bracket, so this was a great improvement. Big shout-out to JSAUX for that.
Step-by-Step Battery Installation
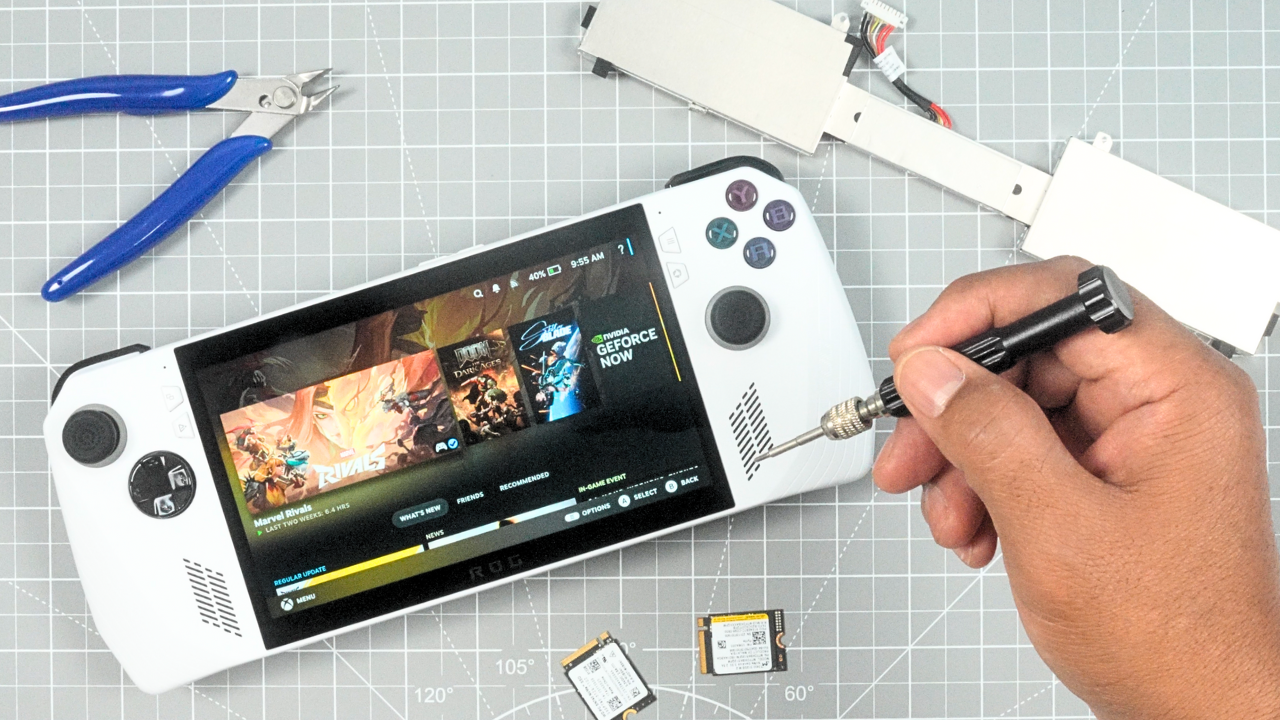
To begin the installation, I removed the six screws from the back of the Ally. One screw in the lower middle didn’t come all the way out, so I just left it in. I used the provided pry tool to remove the back plate. After peeling back a black sticker, I was able to access the SSD and battery connector. I used the edge of the pry tool to carefully remove the piece of aluminum securing the battery connector, which allowed me to disconnect the battery. Then I removed the four screws holding the battery bracket in place, peeled off the tape, and took out the foam strip underneath. To make room for the new battery, I had to trim two small pieces of plastic. I used the included clippers to make one cut on the left side and about three cuts on the right. With that done, I slid the new battery into place and used the screws from the kit to secure the new bracket. After reconnecting the battery cable, I turned my attention to the back plate.
Transferring the Back Plate Components
To make everything fit, I had to transfer the back buttons and triggers from the original back plate to the new one. I removed the screws holding the back trigger and top triggers, being extra careful not to lose the small spring under the back trigger. I then attached all the components to the new back plate, reinstalled the spring, and secured everything with the appropriate screws. The JSAUX kit includes black stickers, and one of them is required to cover a sensor on the Ally during reassembly. Once that was done, I inserted the heat sink, replaced the back cover, and secured it with the six screws.
Battery Performance Comparison: 40Wh vs. 65Wh vs. 74Wh
After the install, I powered up the device and ran a battery test report via the Command Prompt to make sure the system recognized the new 65Wh battery—which it did. I had run a battery test with the original battery prior to the upgrade. Starting at 100% at 2:03 PM, I played Doom: The Dark Ages until 2:41 PM, dropping the battery to 64%. Then I played Marvel Rivals until 2:59 PM, after which the battery was at 44%. I finished with Stellar Blade, ending the session at 3:07 PM with the battery at 35%. That’s a 65% drain over 64 minutes of gameplay, all on performance mode at 15 watts and 70% screen brightness.
To compare, I ran the exact same test with the new 65Wh battery under the same settings. Starting at 99% at 3:33 PM, I finished at 4:37 PM with 65% battery remaining—only a 34% drain over the same period. That’s a major improvement. Just for context, I had previously installed a 74Wh battery in my other ROG Ally. With that battery, I went from 99% to 67% over 64 minutes—only a 32% drop. Surprisingly, the difference between the 65Wh and 74Wh batteries wasn’t as dramatic as I expected. Of course, this wasn’t a highly controlled lab test, so some variability is expected. But overall, upgrading from the stock 40Wh battery to something larger was absolutely worth it.
Installing Steam OS (And a Small Mistake I Made)
Now, let’s talk about installing Steam OS. The process is pretty simple, although I did make a small mistake along the way. I started by going to the Steam support page to download the Steam OS image. Following Valve’s instructions, I used a program called Rufus to burn the image to a USB drive. Since my ROG Ally came with a 512GB SSD and I was running low on space after installing just six games, I decided to upgrade to a 2TB Corsair SSD. I formatted the new SSD to EXFAT using Windows Disk Management. Valve recommends turning off Secure Boot before installing Steam OS—something I forgot the first time, which resulted in a red “secure boot violation” screen. To fix that, I entered BIOS by holding down the volume down and power buttons, navigated to the setup menu, then to Advanced > Security > Secure Boot, and disabled it.
With Secure Boot turned off and the new SSD ready, I disconnected the battery, swapped in the new SSD, and booted from the USB drive. I followed the prompts to install Steam OS, choosing to wipe the device and perform a clean install. Once the OS was installed, I selected my language, connected to Wi-Fi, and logged into my Steam account.
Living with Steam OS: What Works and What Doesn’t
Using Steam OS has been a great experience. It’s clearly designed with gaming in mind—the interface is simple and intuitive, and I love how it separates Gaming Mode from Desktop Mode. The OS is lightweight and optimized for smooth performance, and I had no trouble running demanding titles like Spider-Man: Miles Morales, Doom, Stellar Blade, and Marvel Rivals. However, there is one drawback: games like Call of Duty and Fortnite don’t run natively on Steam OS due to anti-cheat system incompatibilities. To work around that, I switched to Desktop Mode and installed NVIDIA’s GeForce Now. It’s not perfect, but it lets me stream those games without needing to leave the Steam OS environment.
Cost Breakdown of the Entire Upgrade
Here’s what the upgrade cost me in total:
- ROG Ally Z1 Extreme (512GB): $500 (on sale)
- JSAUX 65Wh Battery Kit: $80
- Corsair 2TB SSD: $155
- Total Cost: $735
Of course, there’s also the time and effort involved in doing the upgrades yourself. If you’re not experienced with opening up devices or don’t feel confident in your skills, I’d strongly recommend against doing this on your own—it could void your warranty if anything goes wrong.
Was It All Worth It?
All in all, I’m very happy with the upgrades I made. The extra battery life, added storage, and smoother experience with Steam OS have made my ROG Ally a much more powerful and enjoyable device. Whether or not these upgrades are right for you depends on your needs, comfort level, and budget—but for me, it was totally worth it.